-
To make a VPN (Virtual Private Network) connection over the Internet, use the Network Connection Wizard:
[Start][Settings][Network and Dial-up Connections][Make New Connection]
-
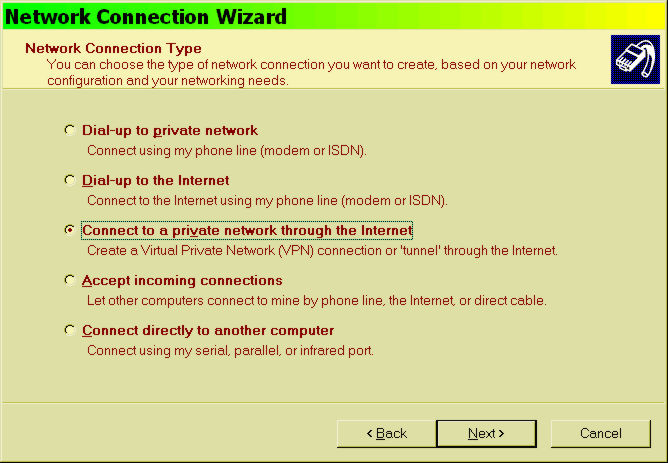
Select the radio button to "Connect to a private network through the Internet":
-
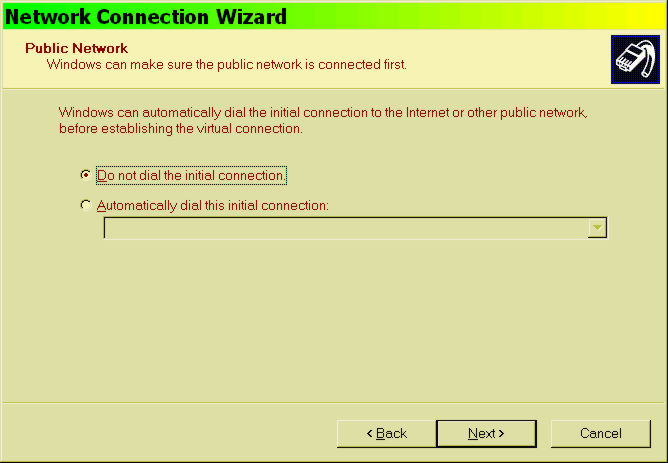
If you have a LAN or automatic connection to the Internet, then use the "Do not dial ... " option, otherwise set up your preferred connection here:
-
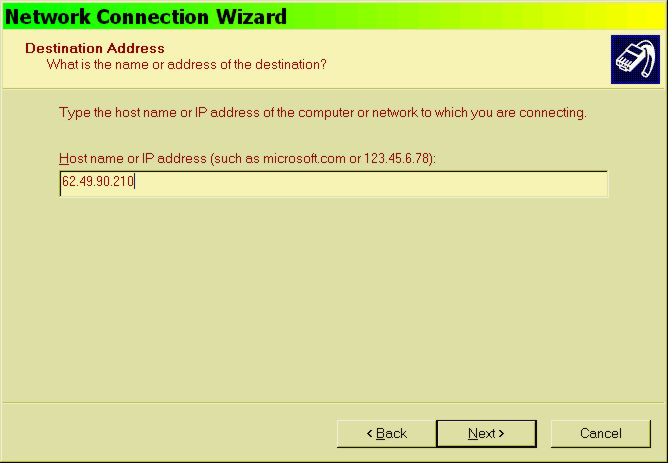
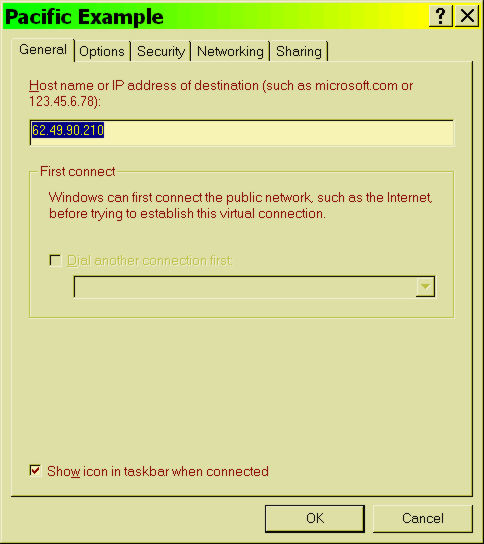
Put in the required IP address for the VPN host. This is preferred to avoid problems with missing DNS entries, and to ensure that a specific server is connected:
-
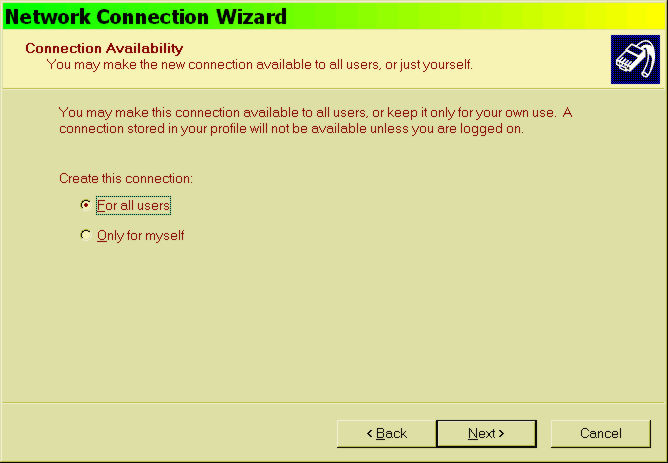
If more than one user logging on to this same workstation is to be connected to the same VPN server, then make the connection "For all users":
-
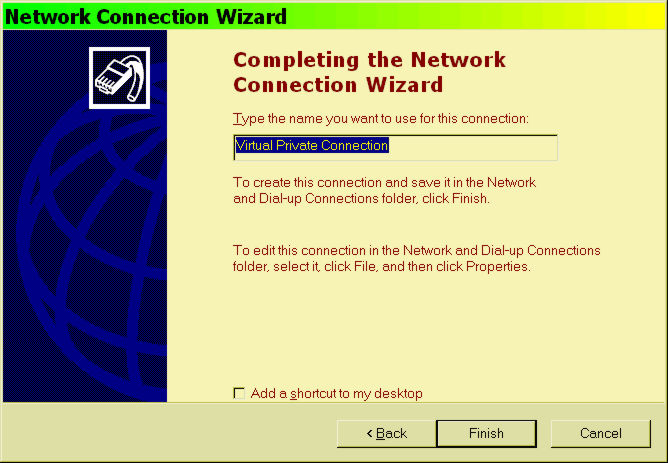
Change the default name of the entry to something meaningful, for example, the short name of the server:
-
This entry is for the server named "Pacific". Note that putting the shortcut on the desktop is useful: it can be dragged from there to any useful location, such as in the [Start] menu:

-
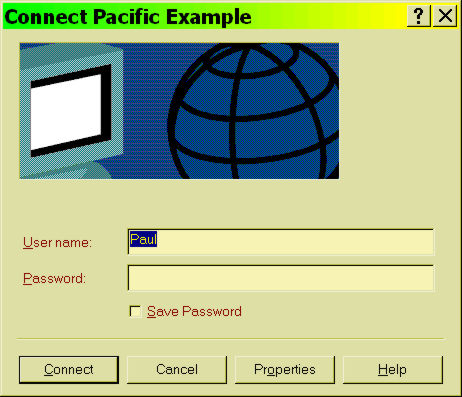
After you press the [Finish] button, the connection dialogue will start. At this stage, it is automatically configured for Linux- and Unix-type server connections. To connect to a Microsoft VPN server, then some further configuration changes are needed, so click on the [Properties] button:
-
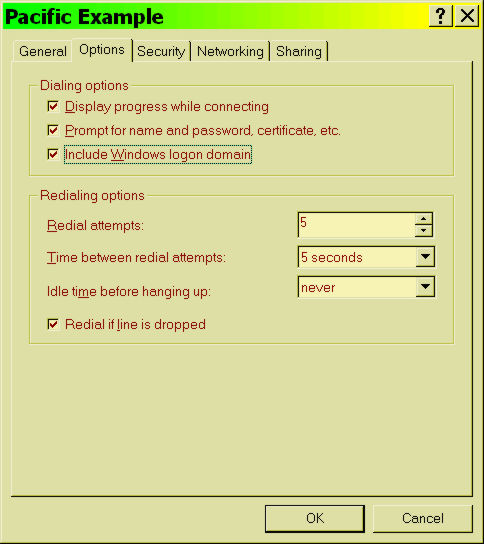
Note that the IP address of the server is now shown in the [General] tab. To make the changes, select the [Options] tab:
-
Tick on the "Include Windows logon domain" check box, and optionally change the number of Redial attempts, Time between ..., and tick on the "Redial if line is dropped" check box. Click on [OK] to continue the connection dialogue:
-
Enter your User name, Password and the Logon Domain: it is also useful to tick on the "Save password" check box, provided that the client PC is properly secured in normal use. At this point, you can click on [Connect] and an attempt will be made to connect:

The author is a member of
